Level With A Spirit Level
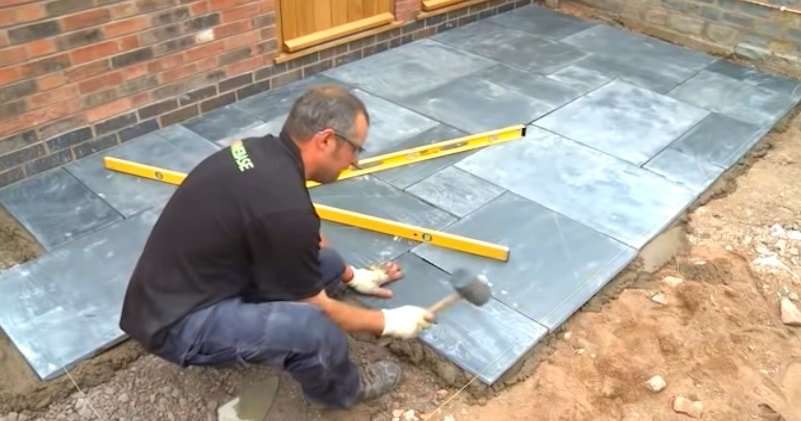
Once the paving slabs are in place, each slab can be leveled by tapping them down gently, either with a rubber mallet or by using the wooden end of a hammer. Continually check the levels and falls of the paving slabs during the laying process.
Place a spirit level across the top surface profile of a number of flags at a time. Check to see if the fall is correct and that water will run off the paving. Using a string line will help with longer laying lengths and help keep the paving slabs in a straight line.
You may find that you have to cut a few of the paving slabs. Especially if you are laying your paving slabs in a random pattern or against a building with drains or downspout. You could always buy a cheap electric or petrol stone saws or you could hire one for a small cost. Another option would be to put gravel in the areas where a cut paving slab should go if you dont have the means to cut the paving slabs.
Once you have finished laying all the paving slabs on your patio it is important that you do not walk on the paving slabs until the cement they are laid upon has set hard. If you do have to walk on them make sure you walk in the centre of the slab and NOT the edges of the slabs. This will help distribute your weight evenly.
F Distance From House Wall
We always start our patios 3 or 4 inches away from the house. We do this for two reasons.
If there is a downpour and strong winds the water can splash against the house wall and with riven slabs especially, can form little pools in the sunken areas of the individual slabs.
Leaving this gap, and filling it with Pea Shingle as shown, will allow any water to drain away down to the foundations of the house where it will not do any damage.
Also, leaving this little trench can make it so much easier to hide reinforced electricity cables if you want to install outside lighting or pumps for fish ponds etc.
How To Lay Paving Slabs On A Patio
There are various ways you can lay paving slabs. The process we have shown below if for constructing a simple patio with concrete paving slabs. The process all depends on what traffic & weight the paving slabs will carry once finished. If you are laying paving slabs for a car to drive on you will need a different process than the one shown below. Constructing a paved area for a driveway for vehicles will involve a deeper excavation than the guide we have shown below.
Read Also: Hurricane Proof Outdoor Furniture
Can You Use Gravel As A Sub
Gravel patio benefits
Easy to lay gravel is an easy material to lay due to its size compared with alternative patio surfaces such as decking or concrete paving. Economical gravel patios are more affordable than other patio surfacing solutions and do not require the help of a landscaping professional to create.
Can You Change The Edge Of A Concrete Patio

Concrete that is in good condition and free of major cracks can be cut with a circular saw to alter the edge. This means you only need to delete one part to create another geometry. The modified border, combined with a new type of landscaping, such as added flower beds or new trees, makes the concrete deck look like a new room.
You May Like: How To Keep Outdoor Rug From Blowing Away
Nine: Lay The Paving Slabs
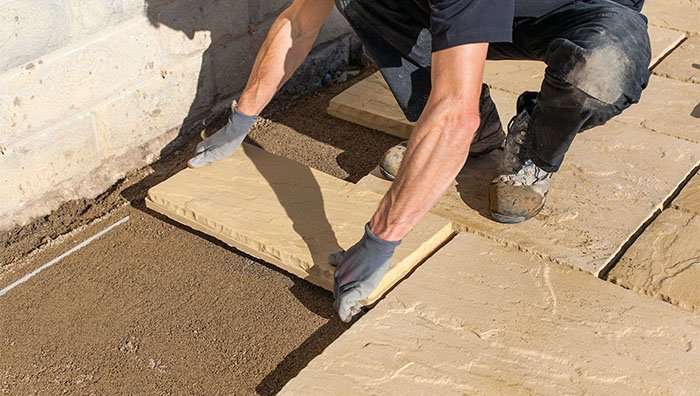
Make up a mortar mix with four parts of sharp sand and one part cement. Lay the first slab in a corner on the highest side of the patio. Lay enough mortar on the sub-base for the first slab only to a depth of about 60mm. Roughen the mortars surface with the point of the trowel.
Lay the first slab ensuring that the edges are in line with the string lines. Using a short length of thick timber on top of the slab to protect it, tap the slab in using a club hammer or rubber mallet. The surface should be level with the pegs. Fill any gaps in the mortar so the slab is bedded down and there is no rocking movement.
Carry on laying the first row of slabs in the direction of the patios fall following the lines. Use spacers in each joint to create a consistent gap. Check the surface is flat and the slope correct as you work.
Once the first row is laid, lay edge rows from each corner slab to form three sides of the patio.
Fill in between the edge rows, row by row. Check the surface is flat and the fall is correct as you work.
Leave the mortar to dry for at least two days, then remove the spacers.
Mix four parts sand to one part cement adding water to create a damp mix. Use a trowel to apply the mixture to the joints. Use a piece of wood 10mm thick to force the mortar in. Brush off any excess mortar and use a damp sponge to ensure none is left behind on the slabs.
Five: Measure And Plan The Space
Use graph paper to draw a scale plan before you begin. If you are able, you could plan the patio so that it fits the dimensions of the paving slabs so you dont have to cut them. Allow 10mm between them for the mortar joints.
The scale plan will help you consider any steps or retaining walls. Think ahead, too, to when youre mowing. If the patio is above the lawn, there will be edges to trim.
Bear in mind that if the patio is going to be next to the house, the finished surface must be at least 150mm below the damp-proof course. You can usually see its thick line of mortar two or three brick courses up the wall. A patio should not block any airbricks in the walls of your house.
The patio will need a slope away from the house so the water drains away from it.
Read Also: How To Hang Lights On Aluminum Patio
Are Pavers Or Cement Cheaper
Concrete pavers are cheaper than brick. Raw materials for making concrete pavers are much cheaper than brick materials. This helps keep costs low. Concrete pavers, unlike bricks, have virtually no design, style and color restrictions.
What is a porchWhat is the difference between a porch and a patio? Some porches extend around one or both sides of the front door. Advertisement. Another key difference between a patio and a porch is that patios are generally built at ground level with brick, concrete slabs, or tile. The porch, on the other hand, can be concrete or wood and is at the level of the front of the house.What are the benefits of having a porch?Extra prote
Measure The Area Of Your Intended Space And Paving Slabs
Start by measuring the area that is to be paved and calculating just how much paving will be required.
The area of your intended patio space is usually measured in square feet. To calculate this, simply multiply the length by the width of the proposed patio area.
For example: if your proposed area is 15ft in length and 10ft wide, the measurement of this space is 150 square foot.
To calculate the area of your paver, multiply the length by the width then divide by 144 as you will need to convert this unit into square feet.
For example: if the measurement of your intended patio area is 25 meters squared and your paving slab measures 12 inches x 15 inches, multiply 12 x 15 = 180, then divide this by 144 which is 1.25 sqft.
To calculate how many paving slabs you need for your project, divide your total project area by the total area of your paving slab.
For example: 150 sqft divided by 1.25 sqft = 120 pavers
Minster Tip: we recommend adding 10% to the total amount of pavers you intend to purchase, this will account for any broken slabs and any that need to cut to fit corners etc.
If you need further assistance, Minster Paving can help you with this by recommending materials and suggesting a selection of sizes that can be combined to best cover the area.
Read Also: How To Build A Patio Cover Attached To House
Should I Compact Sand Before Laying Pavers
Not compacting the base
Before laying bedding sand or pavers, your gravel base needs to be flat and firm, without any bellies or rises of more than 1/8. You accomplish this kind of precision by properly compacting your base and your pavers. If you fail to compact, youll experience sunken or raised pavers.
Dig Down And Mark Out The Area
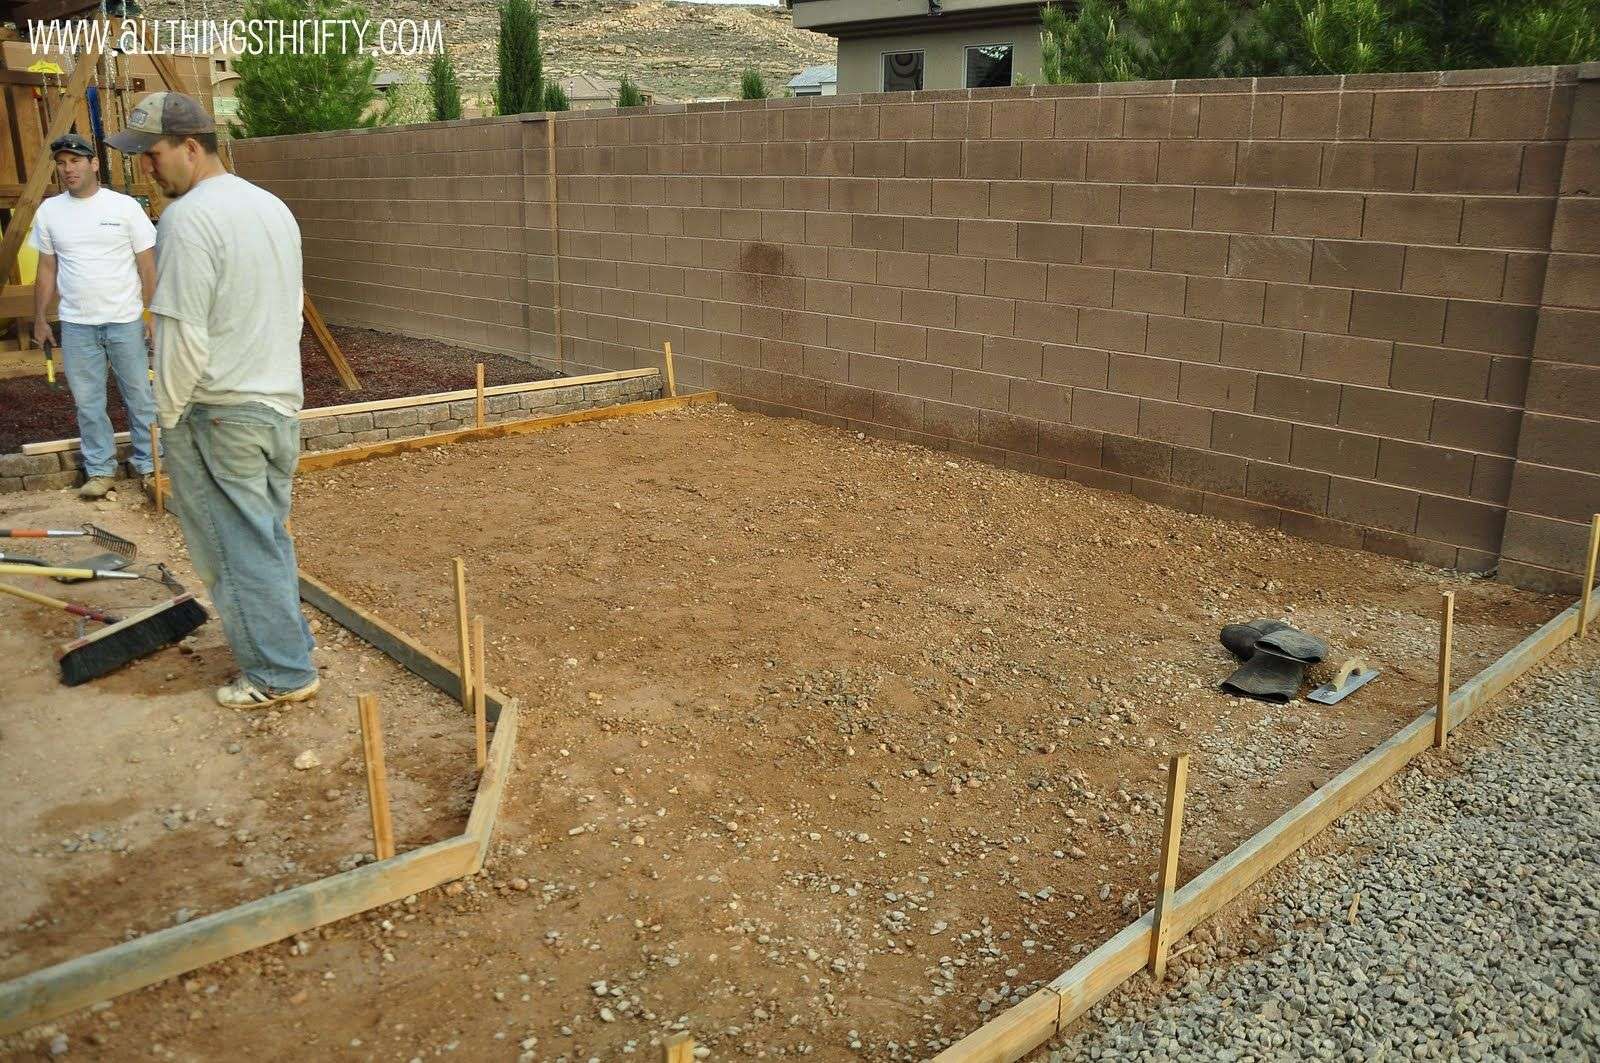
Remove grass and topsoil from the area to be paved by digging down 150mm. For some working room, add an extra 150-300mm to the area, and then rake the ground.
Next, mark out the patios edges by knocking pegs into the ground and fastening string to them at the height youd like the slabs to sit. Pull the string taut so that you have straight lines to guide your work.
You May Like: How To Fix Broken Patio Umbrella Pole
D A Layer Of Scalping Stone
This may or may not be necessary. As mentioned before, it depends entirely on the ground conditions.
If the ground is soft and spongy, you need hardcore or scalping stone. If it is not you can lay the mortar bed directly on the soil once loose topsoil and lawn/weeds have been removed.
We also strongly advise the use of a layer of weed fabric either between D and B or under B if D is not to be used.
To test the ground to see if any hardcore or scalpings are required you can do the foundation test used to establish the quality of the ground when getting ready for a concrete foundation. This test is also outlined in our driveway and path project.
The test is also specified in Approved document A1/2 in section E1 of the building regulations so if anyone argues with you, or another web site publishes information that you must use hard core, they are completely wrong!
What You Will Need To Lay Paving Slabs On A Patio

- Paving slabs. Your choice of paving slabs
- Shovel or spade for removing soil or sub-base
- Wheel barrow or buckets for transporting removed soil
- Spirit level. Helps you get the correct levels
- String line. Squaring up measure
- Trowel. For spreading, laying and pointing mortar
- Rubber mallet or hammer with wooden handle
- Cement Mixer. You can mix by hand but time-consuming
- Sand & cement
Important note
Before you begin it is important to remember that under new government guidelines you may need planning permission to create a new patio from paving slabs. The law says that any area around your home that creates a new paving area that is installed over a garden, lawn, gravel or soil area must not allow water to drain away into existing drains. You dont need planning permission if the paving is laid so it is permeable. That is, the water that drains from the surface must flow through the paving into the ground below or run away off the surface of your paving into garden border or soil area to soak away.
You can read our article with links to the government guidelines on laying paving slabs and whether you need planning permission here
Don’t Miss: Diy Patio Storage
Why Are My Patio Slabs Not Sticking
If its too dry theres isnt enough moisture to transfer to the dry surface of the slab if that makes sense. Its one of those things thats trial and error initially. Spraying the underside of the slab just before laying it as any dust will prevent the slab from sticking to the blob of cement underneath.
The Ratio For Your Sand: Cement Mix
So how much cement, sand and water do we need and what is the best way to mix the 3 materials? The short answer is that quantities will vary depending on the instillation situation. Variables such a paving material, sub-base quality, patio usage & the drainage required will ultimately determine how strong or weak your mortar mix may need to be. The most common ratios in order of popularity are:
Mixing the mortar together by hand in a wheelbarrow is possible, but can extremely repetitive and physically draining not to mention that the mix consistency can be questionable, by far the easiest way, where possible is to use a cement mixer. A cement mixer produces a consistent mix with minimal physical exertion. Simply put the machine is doing all the hard work.
In our opinion a standard back garden patio installation with a good sub-base and substantial drainage, we would recommend a 7:1 mix which equates to 7 even parts of sand and 1 part cement. For example, if you have 70kg or sand you would require 10kg of cement.
Recommended Reading: How To Remove Mold From Concrete Patio
How Long Does It Take To Lay A Patio
I wont sugar coat it, laying paving is hard work and can be time consuming. When thinking of laying some paving you should count the cost and make sure you are up for the job.
Starting from scratch in a garden you should put down for at least 2.5 hours per square metre of paving. This takes into account all of the preparation right through to completion.
Joints Between Your Patio Slabs
When this row is laid you can now start moving down the garden. No pro uses a string line due to the fact that patio laying, unlike brickwork, is not an exact science.
The patio slabs are never exactly the same thickness, they are never 100% square, and they are never exactly the same size either.
Keep your patio slab joints to a decent width . This gives you a little room for manoeuvre when the slabs differ slightly.
Keep patio slab joints to a width allowing room for manoeuvre
You May Like: How To Fix Patio Umbrella
Tips Before You Start
Before you start laying your patio, it might be a good idea to draw out a simple plan of your home and garden.
This will allow you to identify the areas you would like to be paved.
Once you have made your plan, mark out the areas with string to outline the dimensions of the proposed areas of your patio. Once this has been done, you can then begin your patio project.
If youre planning on removing any turf from your proposed patio area, make sure that you keep some spare during the process as you may want to fill in any gaps between the new patio and your lawn.
Mixing Mortar In A Cement Mixer
Pour about a quarter of a bucket of water into the mixer. Add half the sand, then the cement. Run the mixer, then add the rest of the sand and more water if necessary. Mix it thoroughly until you have a soft consistency.
Dont allow mortar to dry on your tools. Clean them with a stiff brush from time to time. If using a mixer, wash the drum thoroughly after use.
Recommended Reading: How To Paint Wrought Iron Patio Furniture
How To Lay A Patio Next To A Building
If you’re laying a patio next to your house, you will need to create what’s known as a fall meaning that your patio will need to be slightly sloping to allow water to drain away from your house and not collect by walls.
This is done by inserting wooden pegs in a grid where you sub base will go, ensuring that the pegs go in between 12 and 16mm deeper for every metre away from the house. Pre-mark the pegs with a marker to make sure your measurements are correct.
Then, at the sub base filling stage, make sure the aggregate just covers the tops of the pegs.
- How to lay decking for another spot in your backyard.
Figure B: Border Layout

A Snap a chalk line parallel to the house to mark the location of the border decorative pavers. Remember to leave a gap of at least 1/4 in. between the border decorative pavers and the house.
B Lay out field pavers to locate the side borders. A simple row of pavers will work even if you plan to lay them later in a herringbone pattern as we did. The goal is to establish a field width that allows each course to end with a full or half paver, but not smaller pieces. That means less cutting, less waste and a neater look.
C Position the border pavers and mark their locations. It’s OK if the border decorative pavers don’t quite reach the edge of the patio, but don’t let them overhang. Nudge one border patio block outward by 1/4 in. to allow a little extra space for the field pavers.
D Snap a chalk line to mark one side border. To make this line square with the line along the house, use the 3-4-5 method.E Mark the other side border. Measure from the first side to make sure the two sides are parallel.
F Leave the final border unmarked and install the border after the field is complete. That open end makes screeding off the excess sand easier and lets you position the final border perfectly.
Also Check: How To Install Sliding Screen Door Bug Seal